
I have come across a few no-knead bread recipes and found that each one wasn’t quite right for me (though they are usually very good) so I thought I’d write my own one down here. It isn’t original – just refined from several sources.
Just two things to remember about this recipe. It is easy. The bread is delicious. In all, it takes me just under 2.5 hours to have the bread cooling on the rack, and it takes about 10 minutes of my time (the rest of the time I am doing other things).
- Put 9g of instant, dried yeast and 5g of sugar in a large bowl (sometimes I have added a bit more by mistake – it doesn’t matter).
- Add 250ml warm water (I normally get about 150ml of tap water and top up from the kettle).
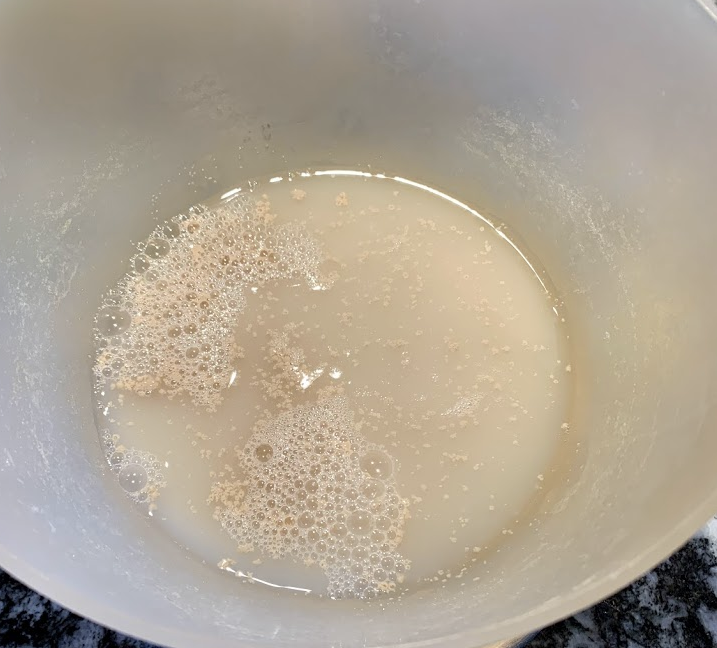
- Leave for about 5 minutes. You’ll find the mixture goes cloudy as the sugar feeds the yeast.

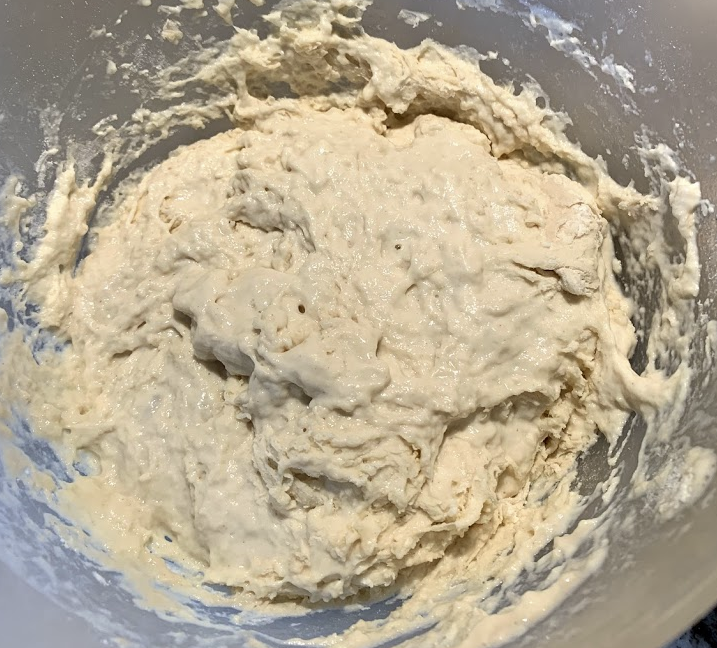
- Add 360g flour. This can be any flour. In the UK it would be strong, plain flour. In Germany, type 550 is good, though I often use spelt flour (type 630) and sometimes type 1050. Sometimes I mix the different types – it’s all good.
- Add 9g salt.
- Mix. I find the best way is to stick my (clean, obviously) fingers in the center of the flour and stir. You want to end up with a sticky dough – it might take up to 60 seconds. Make sure the dough is wet through. If the mixture is too dry then add a splash of water (literally a splash – amazing how it can go from dry to waterlogged with just a little too much water). Scrape the excess off your fingers – let’s not waste any lovely dough.
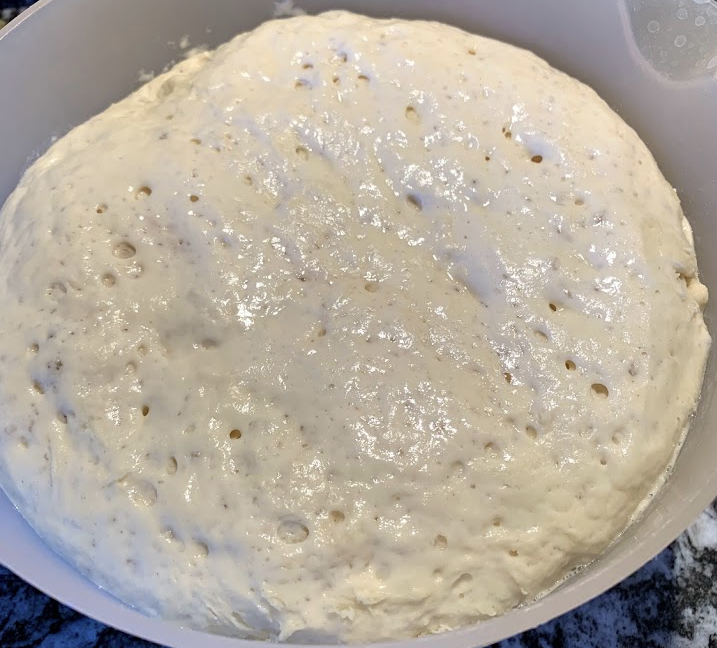
- Cover with a tea towel and leave for about an hour. When you uncover after the hour is up, you’ll see the dough has risen to about double the volume.
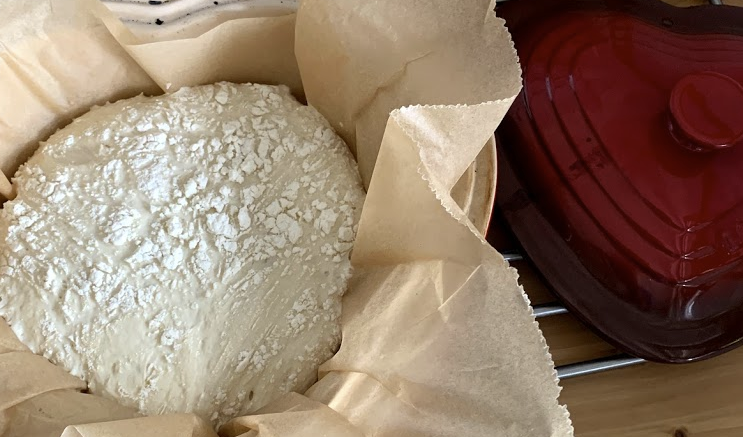
- Using your fingers, spread some flour on a chopping board. Tip the dough onto the board (using a butter knife to scrape all of it from the bowl). Fold the dough in from the sides, push it slightly flatter and repeat a few times. You can sprinkle a little flour over the top if the dough stays stubbornly sticky. You’re after a nice ball of dough. This normally takes me a minute or so.

- Place the dough ball on some grease-proof (baking) paper and sprinkle it with flour. Lift all four corners and place in a saucepan (this helps it to keep its shape and not let it flatten), place the lid on and leave for about 30 minutes.
- 15 minutes into the 30 minute wait, turn the oven on to 235 degrees C with a dutch oven inside it. (I had to look up what a dutch oven is: turns out it is any oven proof container – I use a casserole dish). Make sure the dutch oven/casserole dish has a lid.
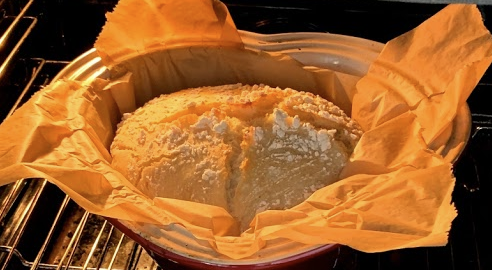
- After the 30 minute wait, take the “casserole dish” out of the oven and remove its lid. Remember it will be really hot – some sort of decent oven gloves are in order here. Lift all 4 corners of the baking sheet and place in the casserole dish, put the lid on and pop it back in the oven.
- After 30 minutes, just take the lid off the casserole dish. This will create a nice crispy top to the bread.
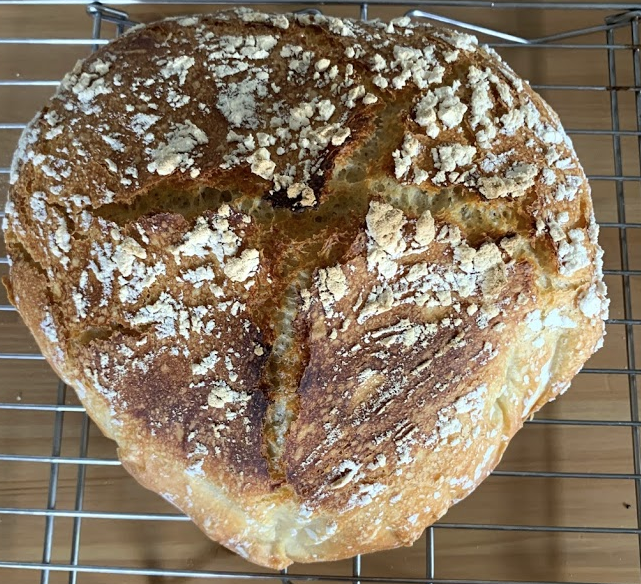
- After a further 15 minutes, take the casserole dish out of the oven. Lift the baking sheet out and place the bread on a rack to cool.
Once you have tried this a couple of times, you can start to make the recipe your own. At step 5, you can add “things” to the mix for variety. One of my favorites is a chopped clove of garlic, but you could also try nuts, herbs, etc.